
dartLaunch
Quick Start Guide
Welcome to dartLaunch - Quick Start Guide
This is a quick start guide designed to get the user comfortable and using dartLaunch quickly and easily.
It's a step by step from first run, to adding your own categories and launches and quickly covers Launcher Forms.
After Installation
The installer will, by default, run dartLaunch for you and add it to Windows Start Up.
If there is not, then please run dartLaunch from the start menu, it'll be under "dartLaunch" in the start menu.
There should then be a rocket icon in the system tray (By the clock on the taskbar). Right clicking the Rocket Icon will show the popup menu which will have a few entries already that are built for you by default. Just left clicking on the icon will show the 'Launch Form', this is like the popup form but has a form UI with a few buttons for quick access to system directories and a few dartLaunch items.
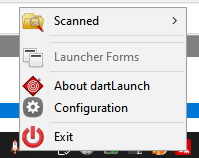
The standard - default popup menu
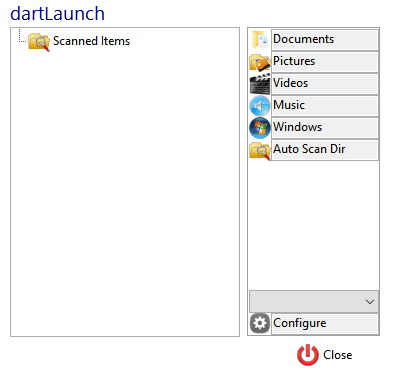
The standard - default launch form
From the popup menu select "Configuration" which has a cog icon to display the following dialog
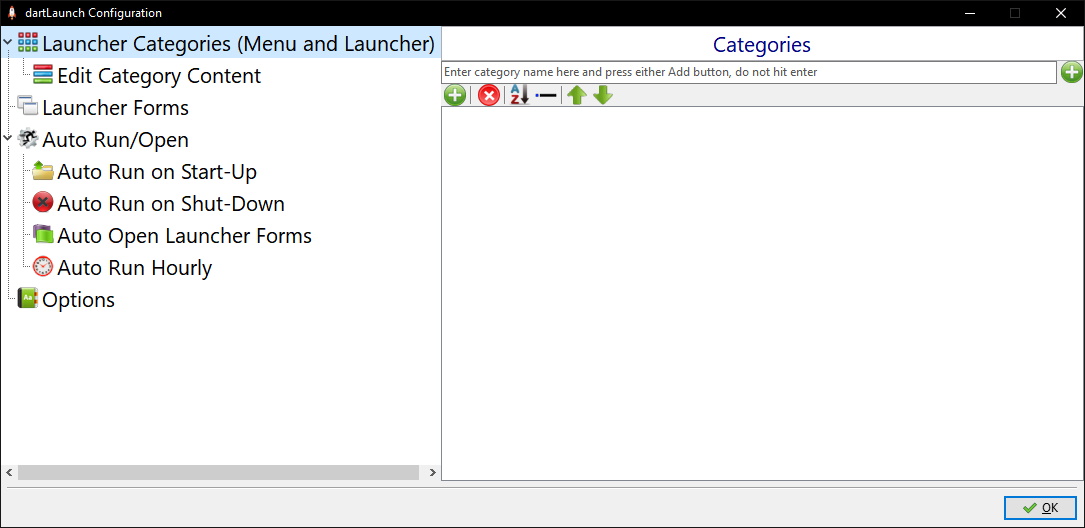
dartLaunch - Configuration Dialog
As you can see the "Launcher Categories" page is automatically selected for you, and this is good. To add anything to the launcher form and popup menu you first need to add a "Category" for it to have somewhere to go.
There is a 'Edit" box at the top of this page, enter "Guide Testing" in that box, and then press the "Add" button which tooks like a green circle with an addition sign in it.
Then you'll see something like this:
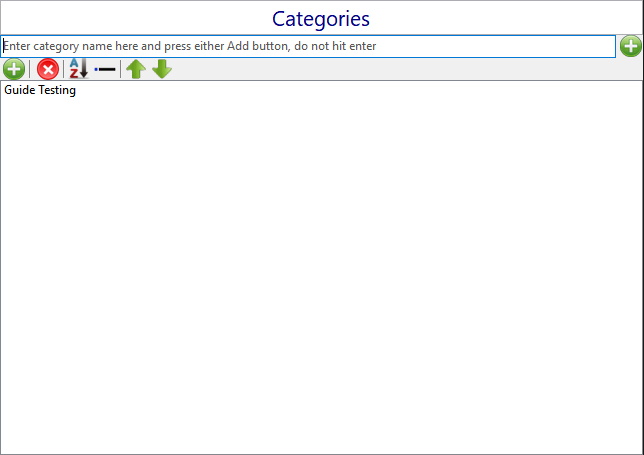
Categories Page, with "Guide Testing" Category added.
Now you have a category you're ready to actually add something to the category!
Select "Edit Category Content" from the selector on the left side of the dialog and the following will show
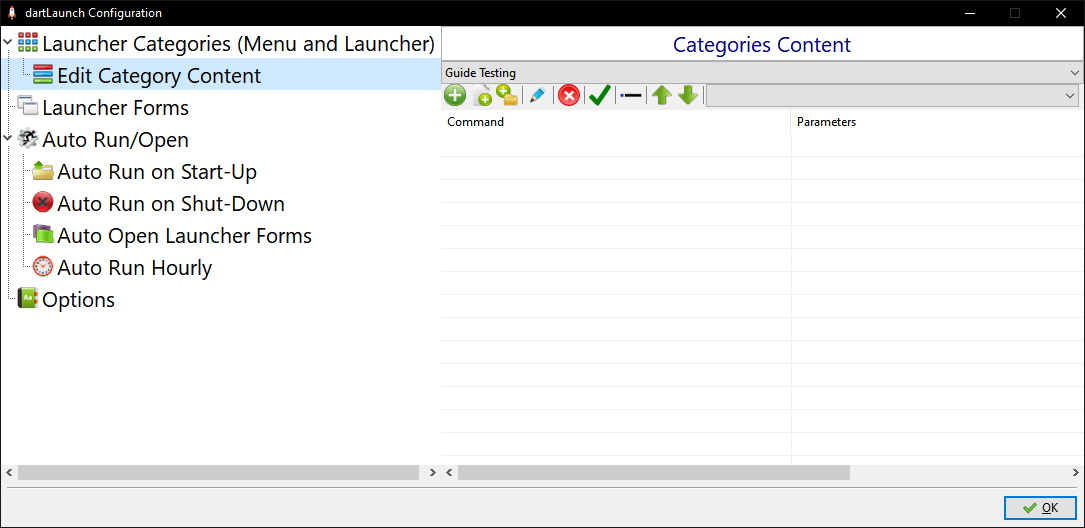
Edit Categories Content Page, with "Guide Testing" already selected for you.
As you can see as it's the first category, "Guide Testing" has already been selected for you, the first category will always be pre-selected
Now we can add something to launch, use the "Add" Button, again it looks like a green circle with an addition sign, (plus) inside. Then the following dialog will be displayed:

Add Entry Dialog.
This is the standard add entry dialog that most pages use for adding content to the category or type. What you actually add here is up to you, I'll be using something else from the Dart Range here which will then look like the following:

Add Entry Dialog with dartEdit entered.
I've used "dartEdit" for this, you can "OK" the dialog at this point and it'll be added to the category but as you can see you can do more. You can change the caption to be displayed at the top of the dialog, add "Parameters" and make a Launcher Form automatically be shown on execution of the entry. But for now we'll go with just launching "dartEdit" without any parameters or forms, and the Caption is automatically set from either the exe (Application) file's version information, or just the filename.
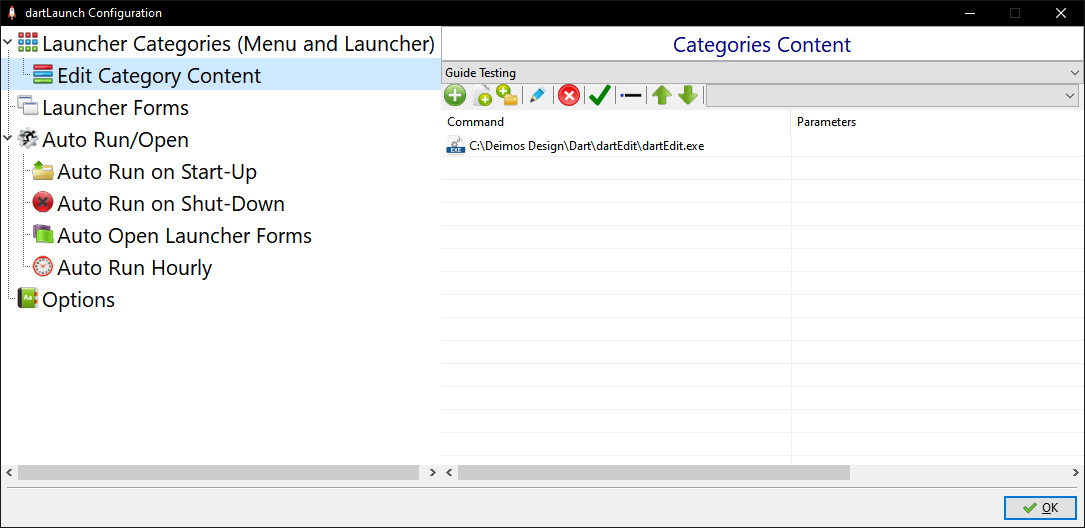
The "Edit Category" page now with an entry showing.
Now press the "OK" Button and this category and it's entries will be saved. There might be a slight pause as the menu is rebuilt, especially with launcher configurations.
Now if you right click the "Rocket" icon the following should be displayed :
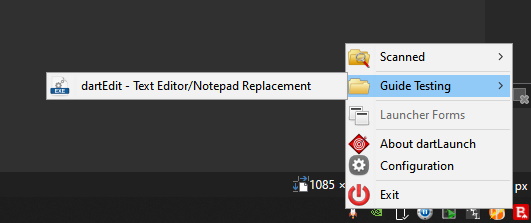
The Popup Menu now showing our category and the contents.
To run the entry merely select it from the menu and it'll be run for you with the options you set.
That concludes the first steps part of the guide, and I hope it was clear and concise, and we'll explore more of what is possible in the next part of the guide.
| Copyright © 2023, C. J. Whittaker | Donate Via Paypal | Become a Patreon! |
| About Us | Helping Out | Index Page |